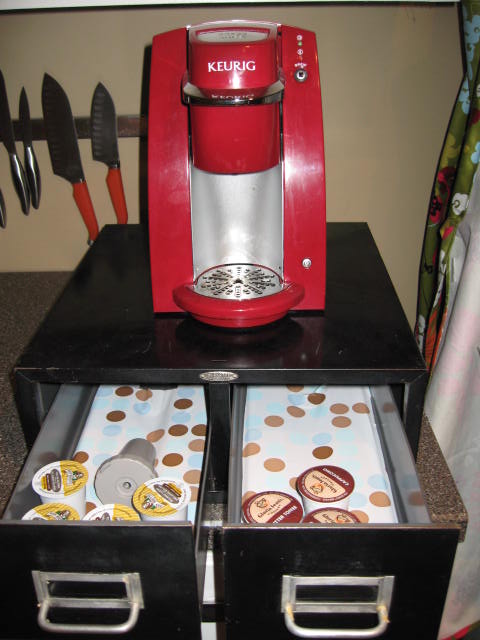
And of course, there is. A friend told me about a drawer that fits under the Keurig and stores the K-cups. What a great idea! And with the help of Google, I find the drawer....for $25. Not bad, but a little too pricey for my blood. Plus, it is sold out. Waa-waa.


Step 1 - Clean. Who knows what has been in this cabinet?! I know that the K-cups are sealed, but I'm not taking any chances. A good scrubbing with some Mrs. Meyers and a magic eraser quickly removes all the yucky buildup and makes the cabinet shiny clean.
Step 2 - Shelf Liner. I don't think this is a necessary step, especially since the cabinet is super clean now; however, I love the cute pop of color the shelf liner adds to the drawers. This is the dreaded stick-on shelf liner, but it was too perfect to pass up. Anyways, cut the shelf liner to the needed size, peel and stick.

Step 3 - Grease. Not really grease, but I didn't know what else to name this step. I used a leftover taper candle to "grease" up the tracks so the drawers would slide easier.
Step 4 - Felt. My kitchen is not blessed with a lot of space between the counter top and the cabinets, which means the Keurig can't fully open its lid when placed on the drawer and pushed all the way to the back. And since I don't want my new countertops getting scratched by the drawer being slid to the front so we can pour the water in, adding felt is a must. I cut strips of felt and then stuck the strips on the bottom of the drawer.

Step 5 - Load. Put your K-cups into the drawers and enjoy.
That's it folks. A super-easy, super-cheap way to store K-cups.
0 comments:
Post a Comment